- Using Landscaping Tools
- Size & Strength Settings
- Contour Lines
- Level Terrain Tool
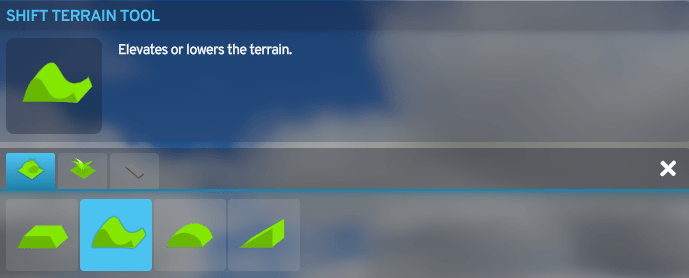
- Shift Terrain Tool
- Soften Terrain Tool
- Slope Terrain Tool
- How to Apply These Tools
USING LANDSCAPING TOOLS Back to top.
Video tutorial starts here.
Landscaping is available at the very start of the game in Cities: Skylines II and doesn’t cost any money to use.
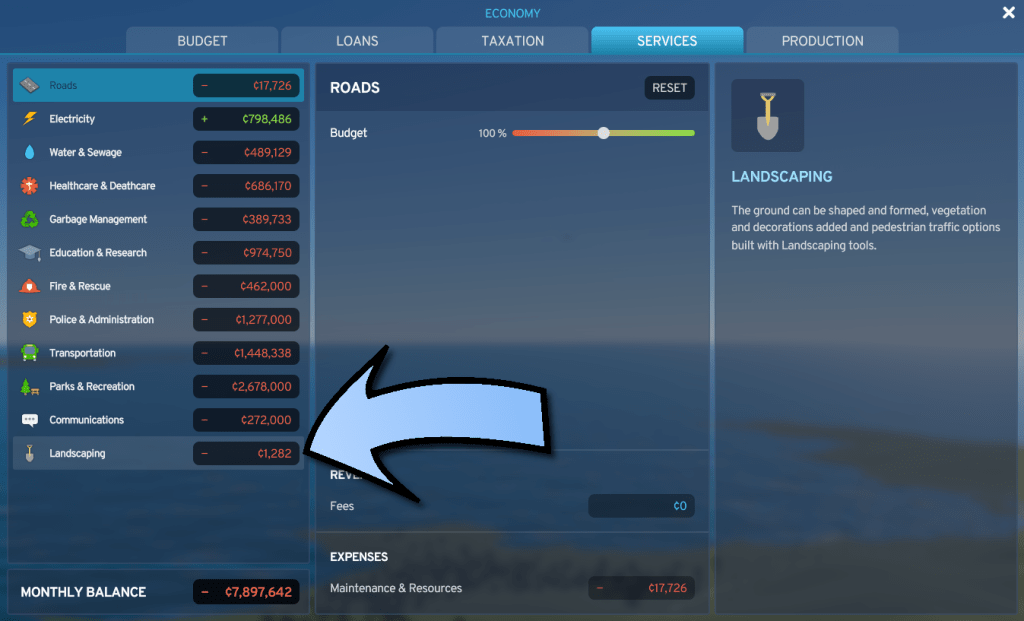
Don’t be mislead by this Landscaping section of the Services tab in the Economy menu – you can go wild with the landscaping tools and it won’t add to this expense; so far only pedestrian paths do.
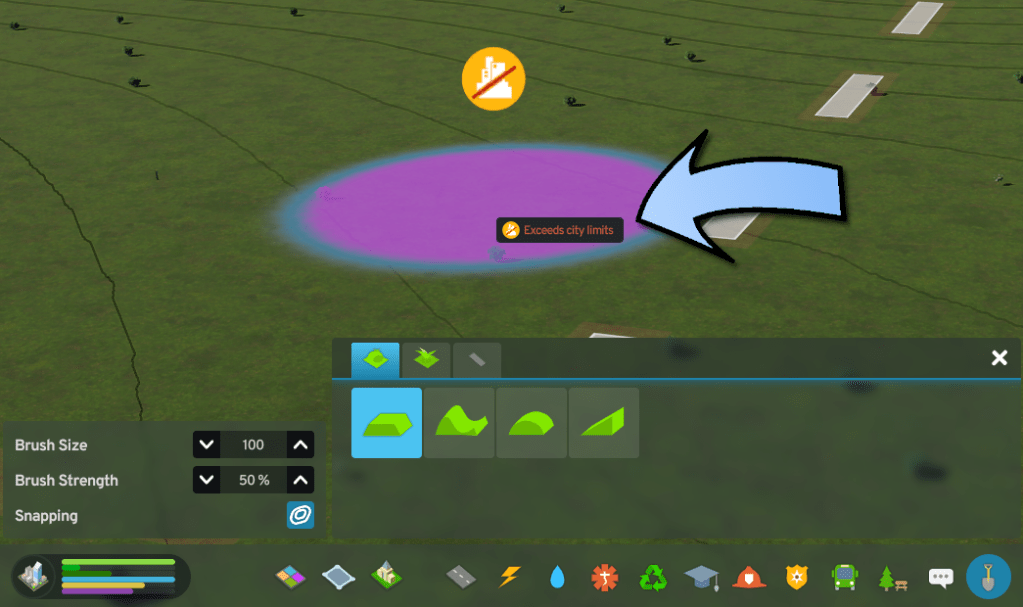
You can only landscape within the tiles that you have purchased.

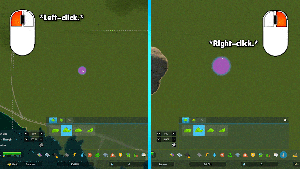
At the time of writing, controller inputs are not final in Cities: Skylines II. By default the Apply Tool is bound to left-click and the Secondary Apply Tool is bound to right-click with a mouse. If you are using a controller, look at the menu and see which button these inputs are set to for use with this tutorial.
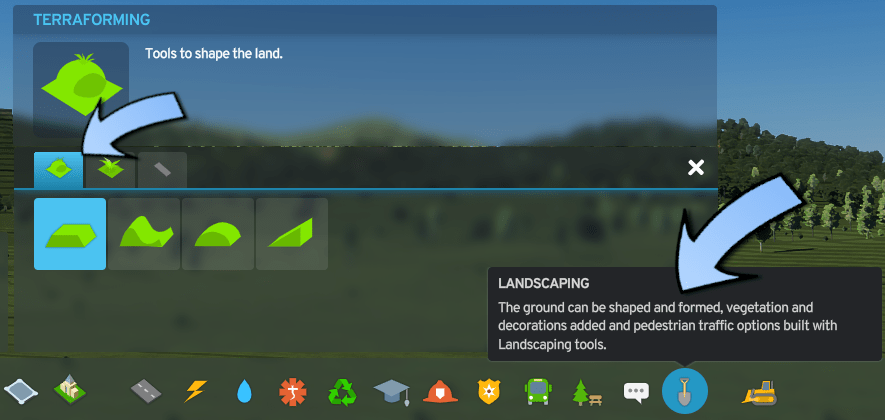
Click this shovel to access the landscaping menu. This tutorial will focus just on the first tab labelled terraforming (even if that is the incorrect term).
SIZE & STRENGTH SETTINGS Back to top.
Video tutorial starts here.

All four of the landscaping tools have the same options in this little box. Brush size ranges from 10 to 1000, 10 being the size of one zoning cell. Brush strength ranges from 1% to 100%. Above 10% it changes in increments of five and I can’t think of a time that I would use a strength less than 10%, though you can decrease it at single percentage steps after that.
Any settings you apply stay set as you change the tool you have selected. If you want to go back and forth between two tools and use different size or strength for them, you will have to set the size or strength each time.
CONTOUR LINES Back to top.
Video tutorial starts here.
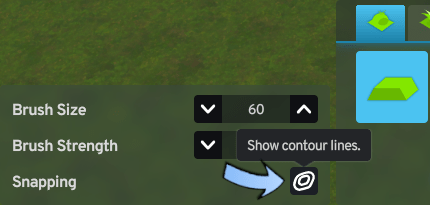
This button labelled snapping is actually a toggle for what are called contour lines.
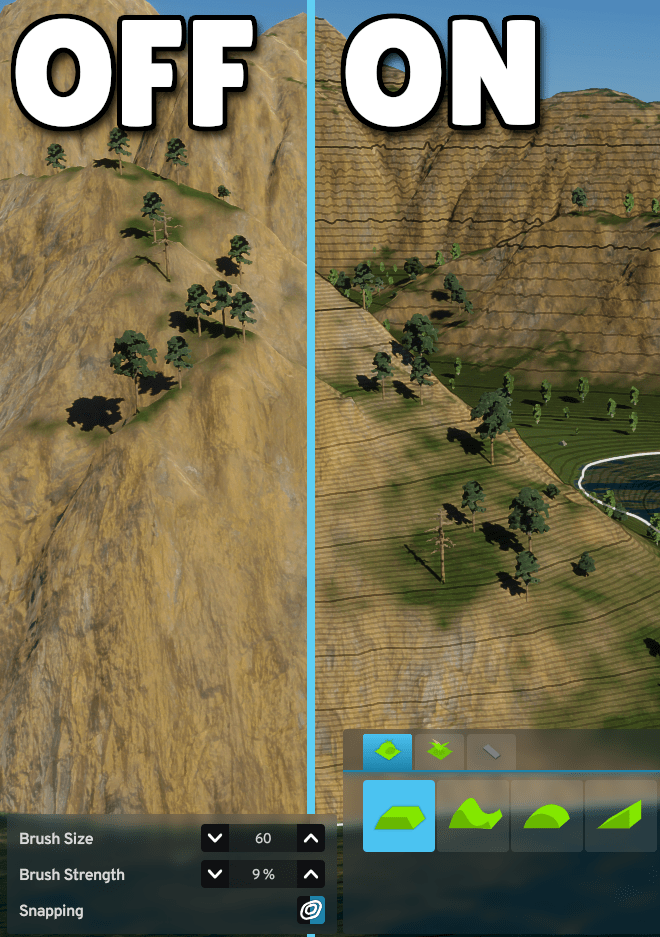
If you’re not familiar with them I suggest looking at different types of terrain and toggling them off and on and you’ll get used to how they represent the different elevations of the land. The Windy Fjords map is a great map to see them clearly.
If you zoom in enough you’ll see three regular contour lines, getting progressively thicker or darker. The smallest lines represent one meter in height. Next you’ll see a slightly darker line at ten meter steps. And finally the most noticeable lines at one hundred meters. You’ll also see this white line showing up, meant to represent sea level. It can be a bit confusing when you have your camera positioned high up, looking down, as you see it at the top of land, but just think of it as showing where the water is.
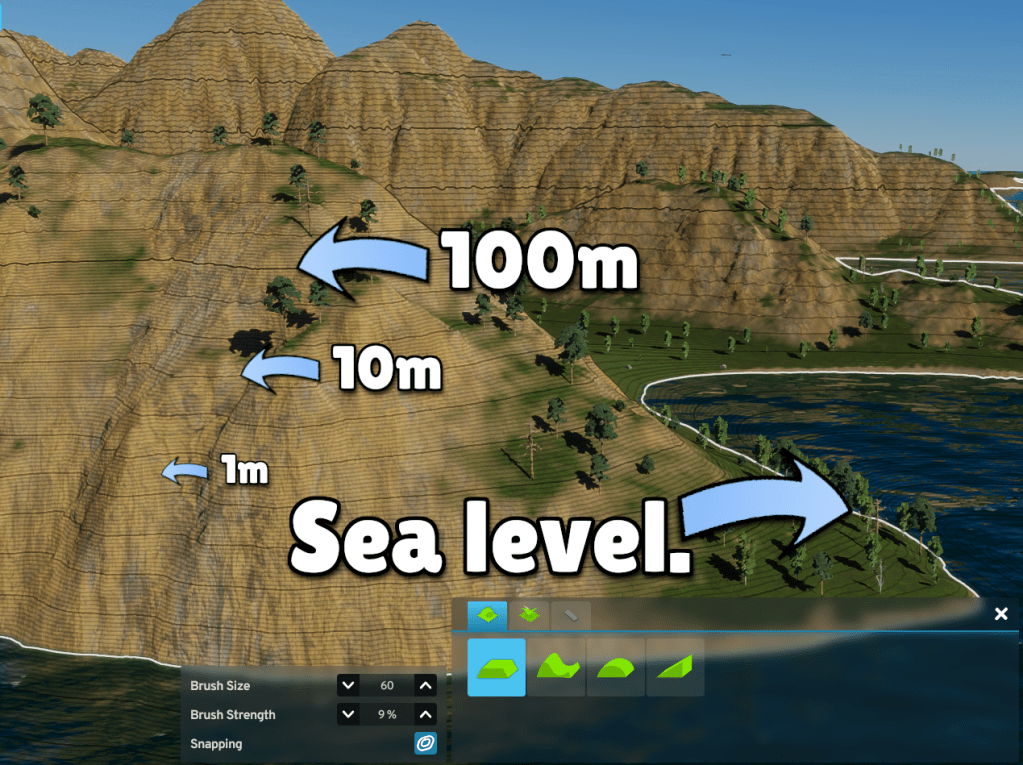

A practical way to understand these lines: The less steep a slope is, the farther apart the contour lines will be. If instead you see contour lines packed close like this, you have a much steeper slope.
LEVEL TERRAIN TOOL Back to top.
Video tutorial starts here.
The level terrain tool allows you to set a desired height then bring land to that height.

First you must set the desired height with your Secondary Apply Tool input, by default this is right-click with a mouse.
You can right-click anywhere on your map to set the height; it does not have to be within purchased tiles. There has to be actual land or soil at the height you’re trying to set. For example, the top of a building doesn’t work. The height of a road does work as long as that road is flat on the ground, not cut, fill, elevated, or bridge. Setting your desired height only chooses where the land will go on the vertical axis. This is different than the slope tool which we’ll see later.
There is no visual or audio indicator to show that you have successfully set your height but it is as simple as right-clicking once with your cursor hovering over a piece of land at the height you want.
Once you have set your desired height with right-click, move your cursor over the land you want to affect and use your Apply Tool input, by default this is left-click with a mouse.
As you hold left-click you will see the land either raise or lower to eventually get to the height you set. How quickly it gets to that height is determined by the brush strength you have set; you will most often use 100% strength for this tool.

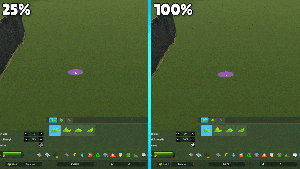
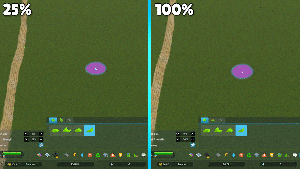
This is a comparison of the brush strength set at 25% on the left and 100% on the right, both elevating the land to and from the same heights.
No matter the size or strength used, this tool will never move land beyond the height you set. You can left-click repeatedly to achieve the effect but it’s most common to hold down left-click and move your cursor as needed to cover all the land you’re wanting to change.
As shown this tool can be used to both elevate land higher or to lower land. Holding down the Apply Tool input will do whichever is required to achieve the height set by the Secondary Apply Tool.
SHIFT TERRAIN TOOL Back to top.
Video tutorial starts here.
The shift terrain tool allows you to raise or lower the land freehandedly.
You elevate land higher with the Apply Tool input, by default this is left-click with a mouse.
You bring land lower down with the Secondary Tool input, by default this is right-click with a mouse.
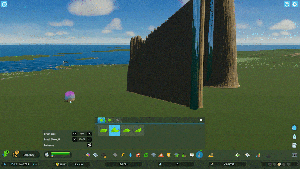
If you hold down the button, the land will only stop raising or lowering once it has reached the map’s maximum or minimum height. Keeping the cursor in exactly the same spot on your screen doesn’t necessarily mean you will only affect that same spot of land. See this example of where the camera is placed and how that means the land shifts under the cursor as you hold down the input, also keeping in mind camera height is dependent on the landscape below it.
This shift terrain tool is often used at lower strength settings – I would suggest generally at or below 50% until you’re familiar with it or going for a more wild effect.
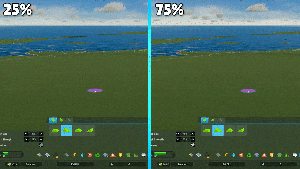
This is a comparison of the brush strength set at 25% on the left and 75% on the right, both elevating the land from the same height.
Keep in mind there is no undo button. If you’ve accidentally gone too far with this tool I find the best way to correct it is with the level terrain tool.
SOFTEN TERRAIN TOOL Back to top.
Video tutorial starts here.
The soften terrain tool allows you to smooth edges or rough terrain.
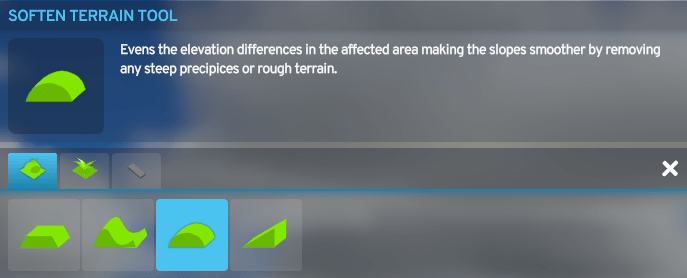
The Apply Tool and Secondary Apply Tool inputs, by default left and right-click with a mouse respectively, have the same base function with this tool. The Secondary Apply Tool, or right-click, applies it more strongly even with the same strength set. Holding down either button will achieve the same final result if held until it stops applying.

This is a comparison of using the Apply Tool input, or left-click, on the left and the Secondary Apply Tool, or right-click, on the right, both softening the same edge of land with 50% strength.
Using different strengths yields different results as you would expect them to. I tend to use higher strengths, often 100%, if I’m trying to soften a large area of land almost flat but not quite flat, making it more suitable for building and zoning easily. I then use lower strengths, often between 20 and 40%, if I’m trying to make terrain less sharp but still visually interesting after having shaped it with the level or shift terrain tools.
This is a comparison of the brush strength set at 25% on the left and 75% on the right, both softening the same edge of land and both using left-click.

Holding down the tool continuously at any strength will eventually achieve the same final result if held until it stops applying. You can also click in shorter bursts for more precision.
Holding down the tool and wiggling your cursor around will smooth the land more and more. Having the contour lines showing is the best way to see all this in action and you’ll get the hang of when to apply which strength and for how long.
SLOPE TERRAIN TOOL Back to top.
Video tutorial starts here.
The slope terrain tool allows you to draw a continuous, even slope between two desired points of land.
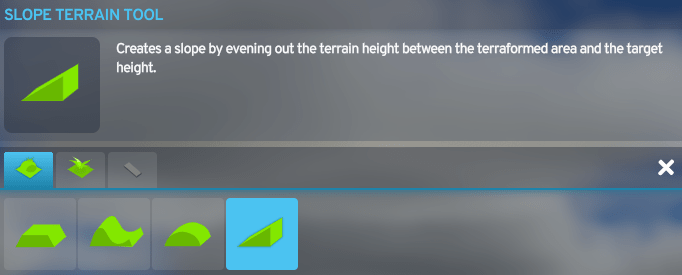
First you must set the desired end point with your Secondary Apply Tool input, by default this is right-click with a mouse.
You can choose the top or the bottom of your slope for this end point, as long as you then start at the other end for the beginning point. I personally find it most comfortable to set my end point at the top of the slope, then start drawing the slop from the bottom.
You can right-click anywhere on your map to set the height; it does not have to be within purchased tiles. However once you start to draw the slope, you will not be able to change the land or continue the slope past the edge of your purchased tiles.
There has to be actual land or soil at the height you’re trying to set. For example, the top of a building doesn’t work. The height of a road does work as long as that road is flat on the ground, not cut, fill, elevated, or bridge.
There is no visual or audio indicator to show that you have successfully set your height but it is as simple as right-clicking once with your cursor hovering over a piece of land at the position you want your slope to end.
Setting your desired end point chooses where the slope will end both vertically and spatially within your city. Essentially on all axes. This will make more sense with the demonstration.

Once you have set your desired end point with right-click, start with your cursor over the position you want to start your slope at. Then use and hold your Apply Tool input, by default left-click with a mouse, and drag your cursor towards where you set the end point. Your slope will form as shown.
The strength setting decides how quickly the land will reach its final, perfectly even slope. Holding down the tool on any setting will eventually reach the same final result if held until it stops applying.
This is a comparison of the brush strength set at 25% on the left and 100% on the right, both sloping the land to and from the same points.

The slope will form even and consistently towards the set end point no matter where you start it from and it will either raise or lower the land that you draw over to accomplish this, whichever is needed. In this example I have set my end point with right-click exactly where this tree is and I don’t change that set point. I do start from different spots around it and draw towards it. You’ll see that when I start from farther away the slope is less steep, and when I start closer it draws it as steep as it needs to be to create an even slope to that end point.
You can also choose not to draw your slope in a straight line. The tool decides how the land will change, or the gradient, based on the set end and start points as though there would be a straight line between them.


The end point is set first, then when you start your slope, you are setting the starting point. As soon as that happens, you can picture lines being drawn out, extending these start and end points in the two directions that are perpendicular to the line that would be between them. As long as you hold down left-click, the slope tool will bring the land to the height that follows a perfect slope from the start line to the end line.
In this example the roads that are going from the bottom to top of your monitor or device are on an incline because they follow the slope. The roads that are going from right to left on your monitor or device are essentially flat, because they follow the direction that doesn’t have elevation change between the start and end point.
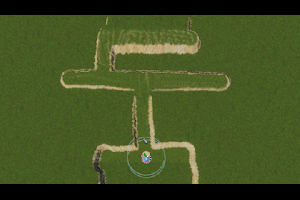
So, ultimately, if you draw a windy slope like this with the slope tool it will work well for laying a road on. Some parts of the road may just be steeper than others.
If you are holding down the button to draw your slope and continue to draw beyond either the start or end point, it will just flatten the land at that height.
HOW TO APPLY THESE LANDSCAPING TOOLS Back to top.
Video tutorial starts here.
These tools can be combined in a variety of ways. When I’m drawing a slope up to a road’s edge, I like to level the terrain in a chunk around that road first, then set the end point of my slope a bit away from the road so that when I draw my slope up to it there’s plenty of level space for the intersection or roundabout.


If I’m fussing around with a mountainside I like to use the soften terrain tool at around 25% to get it to just about where I want it, then go back over some bits with the shift terrain tool at a size of either 10 or 20 and a strength of 20 or 25 to create little ridges in it. Then maybe soften it again.
You’ll definitely find your own style with these tools after some practise so don’t give up!If you find yourself stuck and want to ask me a question that I can answer real-time, come find me at on Twitch and if you tell me you came from this tutorial. I’ll put down whatever I’m up to and see if I can demonstrate the answer for you in Cities: Skylines. Just make sure you don’t tell Twitch chat that written tutorials are my favourite.
